此圖為成功測試CNN model耗時步驟的範例
主要要跑Machine Learning的程式, 嘗試把記憶體很大的Server安裝Tensorflow and Keras,
感謝鼎中的安裝程式 https://hackmd.io/Qp2TORtJSs25WyhNoBfDVg#
不過我這台Server是CentOS 6.9,稍微舊一點,也不是Ubuntu,果然最後面兩步驟
import tensorflow as tf
import keras
都失敗,主要都是說找不到合適的動態LIB連結(例如GLIBC 2.18)
在網路上參考強國人解決的方法 https://blog.csdn.net/levy_cui/article/details/51251095
不過我有提升版本,畢竟這個網頁是數年前的狀態,而且只取其中一部分
該文前半部直接跳過
我的方法是取其文章後半部"直接升級glibc"
1. wget http://ftp.gnu.org/pub/gnu/glibc/glibc-2.20.tar.gz (此時版本最高為glibc-2.27)
因為硬體跟OS沒有太新,所以取相近適合的版本
tar xvfz glibc-2.20.tar.gz
cd glibc-2.20
mkdir build
cd build
../configure --prefix=/usr --disable-profile --enable-add-ons --with-headers=/usr/include --with-binutils=/usr/bin
make && make install
完成後 輸入strings /lib64/libc.so.6|grep GLIBC
發現最高版本升到GLIBC_2.18
測試
import tensorflow as tf
import keras
此時發現尚缺合適版本GLIBCXX檔
2. 強國人網頁找GLIBCXX檔太舊, 其實若照鼎中的安裝程式步驟中,安裝Anaconda3就有
例如 /opt/anaconda3/lib/libstdc++.so.6.0.24
所以
mv /usr/lib64/libstdc++.so.6 /usr/lib64/libstdc++.so.6.bak
cp /opt/anaconda3/lib/libstdc++.so.6.0.24 /usr/lib64/
cd /usr/lib64/
chmod +x libstdc++.so.6.0.24
ln -s libstdc++.so.6.0.24 libstdc++.so.6
完成後 輸入 strings /usr/lib64/libstdc++.so.6 | grep GLIBCXX
發現最高版本升到 GLIBCXX_3.4.24
測試
import tensorflow as tf
import keras
顯示 TensorFlow backend
成功!
## 遠端Jupyter Notebook
達毅示範Jupyter Notebook是在Windows主機,會自動開啟brower操作
但是我這server主機在機房內,要如何用brower操作?其實開發者都弄好了!
可以參考這篇https://jerrynest.io/install-jupyter-with-style/
因為要遠端會要求登錄帳號密碼
先設設定檔與密碼
jupyter notebook --generate-config
jupyter notebook password
而要遠端時 ip 改為0.0.0.0 並設定port
jupyter notebook --ip=0.0.0.0 --port=9487
此時遠端打 xxx.xxx.xxx.xxx:9487/ 就可以遠端使用
2018年7月19日 星期四
2018年6月26日 星期二
Ubuntu at Win 10 and install GMT
早聞win10可運行Ubuntu, 但遲遲未試,
結果這次安裝發現, 果真容易啊!
從沒裝過Ubuntu, this is the first time!
之前都試Red Hat Group, 想說邏輯上應相似, 見招拆招吧!
### Install Ubuntu at Windows 10
跟安裝Windows程式一樣輕鬆,
選一選安裝, 重開機就搞定!(網路上有圖文並茂的Step by Step說明)
前後約10 min.
### Install fortran
sudo apt install gfortan
真的就這樣就過了!簡單程式測試也ok!
### Install GMT
sudo apt-get install gmt gmt-dcw gmt-gshhg
若要高解析海岸線,參考之前寫的!http://shicinw.blogspot.com/2018/06/gmt5.html
### Install Imagemagick
sudo apt-get install imagemagick
這太多人用, 裝起來毫無問題
結論:
因為windows版本跟apt支援, 所以裝起來很無腦(應說輕鬆愜意啦)!
用cygwin在windows的方法可以考慮轉換一下!
2018年6月13日 星期三
CDO (Climate Data Operators) 套件無腦安裝法@ CentOS 7
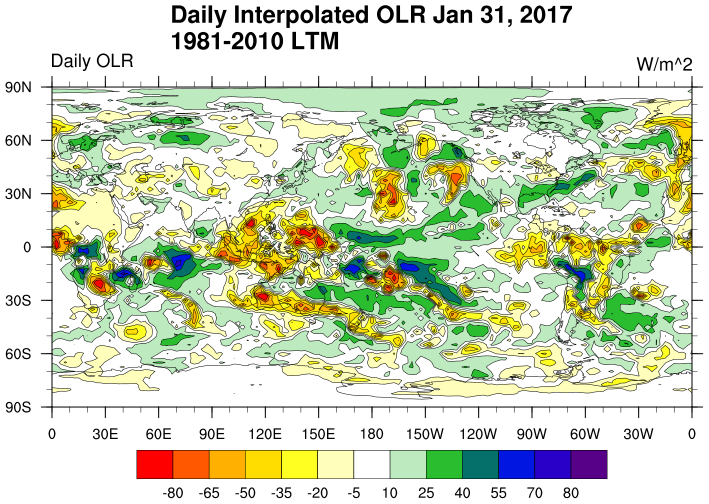
工作上接觸Outgoing Longwave Radiation (OLR)資料,
需要安裝CDO (Climate Data Operators) 套件作資料的轉檔,
剛好OS是CentOS7 (CentOS Linux release 7.5.1804 )故以下這篇超有幫助,
自己blog備份,以免屆時連接失效,
另外撰文此時最新版cdo-1.9.4.tar.gz, 但是make 有error message沒過
降版本cdo-1.9.0.tar.gz 就ok!
##########################################
https://www.esrl.noaa.gov/psd/data/gridded/data.interp_OLR.html
CDO -
Climate Data Operator is a tool developed for perform various operation
on Climate and NWP model output data. It can handle netCDF, HDF5, GRIB
1/2 with compression. It is a very efficient tool work with large
dataset found in a climate model for its simplicity and speed. I wish to
write some tutorials on working with CDO, however this one only covers
the installation of CDO in CentOS 7 system.
To install the basic packages, I will use Yum package manager. First install the netCDF, HDF5 packages as follows -
# yum install nco netcdf netcdf-devel hdf hdf-devel hdf5 hdf5-devel
You can see I have also installed nco, for my convenience actually. If you are not already familiar to nco, please see here.
Now downloading and installing the cdo. Use following commands, hope they will make sense :)
~ wget -c wget -c https://code.zmaw.de/attachments/download/13525/cdo-current.tar.gz
~ tar -xvzf cdo-current.tar.gz
~ cd
~ ./configure --with-netcdf=/usr --with-hdf5=/usr
~ make
~ sudo make install
Here, is
the folder you get after extraction. It depends on the current version.
This should install cdo in your system, and you can access the command
by simply typing cdo in the terminal. Let me know if you have any
problem.
Happy CDOing :-)
To install the basic packages, I will use Yum package manager. First install the netCDF, HDF5 packages as follows -
# yum install nco netcdf netcdf-devel hdf hdf-devel hdf5 hdf5-devel
You can see I have also installed nco, for my convenience actually. If you are not already familiar to nco, please see here.
Now downloading and installing the cdo. Use following commands, hope they will make sense :)
~ wget -c wget -c https://code.zmaw.de/attachments/download/13525/cdo-current.tar.gz
~ tar -xvzf cdo-current.tar.gz
~ cd
~ ./configure --with-netcdf=/usr --with-hdf5=/usr
~ make
~ sudo make install
Here,
Happy CDOing :-)
Posted 1st January 2017 by Severus Snape
2018年6月9日 星期六
GMT 在CentOS 6下 EPEL套件是gmt4
先講結論
1. CentOS 6 下EPEL 套件是gmt4
也可以用yum 輕鬆安裝,不用重新編譯的老方法
CentOS 6 安裝GMT5 要自己編譯
3. CentOS 7反之, EPEL 套件是GMT5
要用gmt4 要自己編譯
################################################
因為CentOS 7 在yum 下很容易安裝GMT5
手賤嘗試CentOS 6 的機器下安裝, 但是裝起來是gmt4版
過程中搞到原來gmt4版也不能run, 影響原本routine jobs! 很煩惱
又要重新編譯了~~~
後來看到此文, 立馬又恢復
https://www.linuxquestions.org/questions/linux-newbie-8/installing-gmt-generic-mapping-tools-in-centos6-4175526545/
##########################################
Dear all,
I just found the solution

it's because of rpm:
first off all I did this:
cd /etc/yum.repos.d/
I just keep these :
CentOS-Base.repo CentOS-Media.repo
CentOS-Debuginfo.repo CentOS-Vault.repo
CentOS-fasttrack.repo
and then deleted others.(it's importatnt do keep JUST CENTOS REPO at this step)
second: I updated Cent by yum update
third: I restarted Cent
forth: yum remove GMT
yum remove epel-release (if it exit)
fifth : it's important to delet all of hdf5* library that I installed befor
so I did this : yum remove hdf5*
after all I installed epel again : yum install epel-release
then I installed GMT : yum install GMT
it's amazing friend!!

#######################
GMT5 成功安裝過程與測試畫海灘球
新server, GMT5出了一陣子, 過去GMT5 安裝都沒成, 試試看
OS: CentOS Linux release 7.5.1804
##############################
OS: CentOS Linux release 7.5.1804
照GMT官網所述 GMT5 安裝在CentOS下很容易
yum裡面都有,不過default的yum 套件庫應該是沒有GMT
所以要先擴充套件庫epel
sudo yum install epel-release
然後就直接用yum (超容易啊!回想之前真是痛苦)
sudo yum install GMT gshhg-gmt-nc4-all dcw-gmt
環境也不用設,都放在系統灌好的位置下,立馬可以用!
這樣安裝假如還要用高解析海岸線(e.g. pscoast -Df or -Dh)需要在官網直接下載
然後解tar解壓縮到想放的位置,並在script(應該可以設在環境中,但沒試)中指向該位置
設定方法如同gmtset,但要合於GMT5的語法
例如 gmt gmtset DIR_GSHHG = /usr/share/gmt/gshhg-gmt-2.3.7
這樣就可以在pscoast中用了!
##############################
測試畫海灘球
用之前gmt4版的script改成GMT5的
以下為小感想或試出的差異
1. 所有GMT5版本都濃縮在gmt這個指令裡, 所以所有指令開頭都是gmt(包含gmtset)
2. grdimge, pscoast, psscale, psxy , 在開頭加gmt後接gmt4版語法都可以用(也有可能是我沒用太多功能選項)
3. gmtset 才設定兩個, 兩個都不一樣, 可以參考error message或跑script會產生出的gmt.conf檔
原本 gmtset PLOT_DEGREE_FORMAT +ddd:mm:ssF 改為 gmt gmtset FORMAT_GEO_MAP = +ddd:mm:ssF
原本 gmtset ANNOT_FONT_SIZE_PRIMARY 20p 改為 gmt gmtset FONT_ANNOT_PRIMARY = 20p,Helvetica,black
4. pstext是常用而改比較大的
gmt4一定要輸入指定七項(x, y, size, angle, fontno, justify, text),
但GMT5只要輸入x,y,text三項,其餘放在指令的參數裡, 沒寫就用預設值
可以參考官網英文版或http://gmt-tutorials.org/scatter_plot.html 中文版
例如 -F+f[字體大小,字體名稱,顏色]+j[對齊選項]+a[角度]
原本 echo "122.30 25.15 15 0 0 LM Taiwan" | pstext -R -JM -P -O -N >>ofn
改為 echo "122.30 25.15 Taiwan" | gmt pstext -R -JM -F+f15p+jLM -P -O -N >>ofn
5. psmeca 原本 -Sa下用 -C1/0, 在GMT5 只能用-C1 才能過
訂閱:
意見 (Atom)


